2nd Congress of Automotive Experts
27 October 2016
Troublesome steering rods
27 October 2016The device in the main role
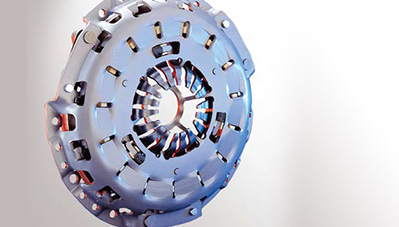
Manufacturers of self adjusting clutches unanimously recommend that both the assembly and disassembly of such clutches are made with the use of a special instrument. It is redundant only in one case, namely, when it is already known that the dismounted clutch is suitable only to be disposed of. It does not matter which of the available instruments will be used.
They are all designed based on the same principle, as their task is to properly bend the disc spring. They are also almost identical in handling, though there may be some differences arising from differences in design and accompanying instruments.
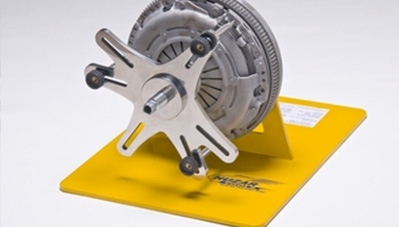
Dismounting and mounting of a self adjusting clutch
Please find below instructions for dismounting and mounting of a self adjusting clutch with the use of a selected model of the instrument. Our choice was the already mentioned tool called Dragon.
Firstly, because it is a domestic product, and secondly because its manufacturer has posted on its website http://www.huzar.biz/en/ a very neat video showing the entire operation, so you can always see how this instrument should be used, also during repair works.
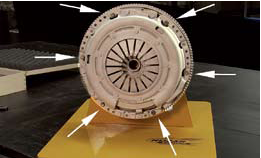
We should also add that the photos below are taken from that video, which is why some of them seem blurred (out of focus). Therefore, if we want to have a guarantee that a self-adjusting clutch, which for some reasons we must first dismount and then mount (for example, to replace the crankshaft seal), continues to work correctly, you should proceed as follows.
The entire operation should begin by unscrewing the clamping screw to the flywheel. Simply remove either 3 screws spaced every 120 degrees (when the clutch is mounted by 6 screws) or 4 screws spaced every 90 degrees (clutches with 8 screws). In the resulting holes, insert the 3 or 4 pins, which must be selected from the toolkit, paying attention to the thread.

Insert the plate of the instrument on the pins by attaching the instrument with nuts from the toolkit. Dragon has only one universal plate; in the case of other instruments in the toolkit, one has three arms, and the other one has four. Tighten the disc spring by turning the main screw of the instrument.


The bolt should be tightened until a noticeable release. Unscrew the remaining screws fixing the clutch to the flywheel. Remove and (withdraw) the main screw of the instrument, then loosen the nuts fixing the plate of the instrument and take the plate off the pins. Remove the pins supporting the plate of the instrument. Remove the clutch (clamp and disc) from the flywheel.
Mounting of the clutch should begin with preparatory steps. If we are to mount the recently dismounted, good cluch, we only have to wipe the friction surface of the flywheel with a solvent. If a new clutch is to be installed, you also need to check whether the clamp (without the disc) can be placed on the setting pins without resistance and clean them if necessary with a steel brush or use a file to (gently) correct the holes in the clamp. Do not use a hammer on the clamp! Note! Do not replace the disc itself.
Select a tool for centering of the clutch disc. It can be a regular clutch shaft, a special shaft (instrument) with interchangeable tips, or (as in the case of Dragon) a socket used for a socket wrench. One of them (with a 0.25 inch socket) should fit the centring hole in the crankshaft; the second (with a 0.5 inch socket) should fit into the hole in the hub of the clutch disc.
The sockets are inserted on a special shaft which is a part of the Dragon. The shaft with sockets should be inserted in the clutch disc, and everything should be then placed on the flywheel. Insert the clutch clamp, screwed in the 3 or 4 pins, and place the plate of the instrument on top of them. The centering shaft should then enter the hollow bolt of the instrument. Tighten the disc spring by tightening the main screw of the instrument until a noticeable release. If mounted correctly, the clamp should move against the flywheel. Insert the screws (3 or 4) fixing the clutch to the flywheel in the free holes (not occupied by pins). Unscrew the nuts fixing the plate, remove it, and remove and the pins on which it was located. The remaining screws fixing the clutch to the flywheel should be inserted in the holes left by the pins, and all the screws should be tightened with the recommended torque using a torque wrench.